TouchDesigner + Projection Mapping
Download the td_projectionMapping.toe file from the TouchDesigner Examples folder on Google Drive.
What is Projection Mapping?
Projecting mapping allows us to mask, warp, and translate video content to fit the shape and perspective of physical objects. TouchDesigner comes pre-packaged with a few different projection mapping tools. An overview of each of those tools, with links to setup guides can be found HERE
KantanMapper
For this tutorial we’ll be focusing on KantanMapper, which is the most straightforward of the tools and often has enough functionality to solve most situations. If you’re interested in mapping to more complex geometry for which you have a digital model, check out camSchnapper.
Setting Up the Projector
If you are using a free version of TouchDesigner, you will be limited to an output resolution of 1280x720 pixels. You’ll want to make sure your projector is set to that resolution as well. Once the projector is plugged in, open the display options for your operating system. Select the projector and set the resolution to 1280x720. Make sure display mirroring is turned off.
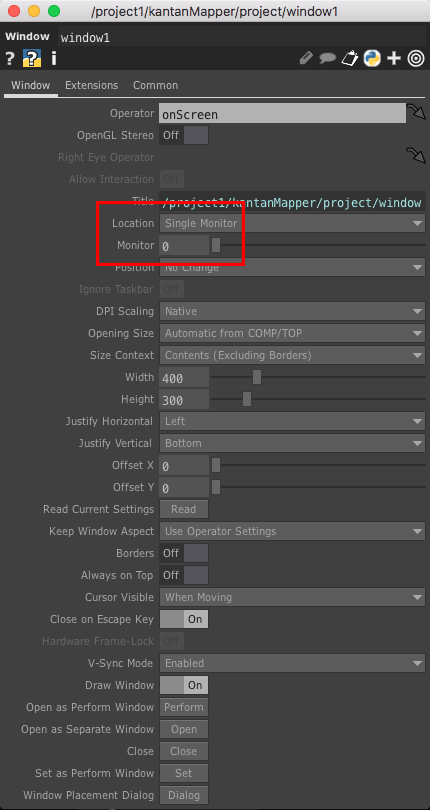
In TouchDesigner, open the kantanMapper window and select the “Window Options” button at the top left. You’ll see an option to select which window you want to use. In most cases, window 0 is your default screen and window 1 is the first projector. Select 1. Back in the kantanMapper window, click “toggle window” and a black screen should pop up on the projector (or whatever is already in the kantanMapper COMP).
KantanMapper Setup
KantanMapper is a fairly straightforward tool, but its usage isn’t particularly intuitive. The steps below should help you get up and running with a basic projection mapping setup.
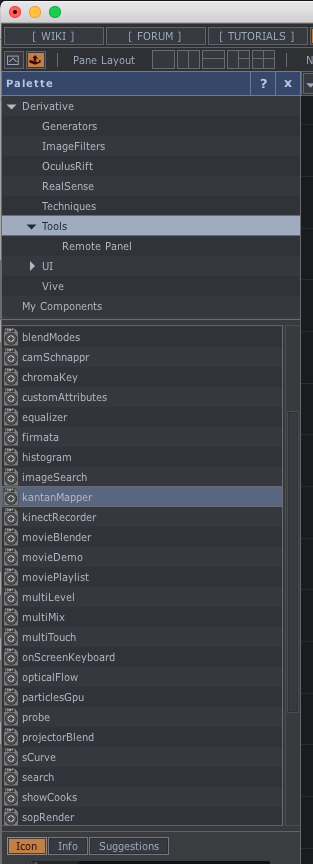
You can find kantanMapper in the Palette section. Drag the kantanMapper from the palette onto the canvas.
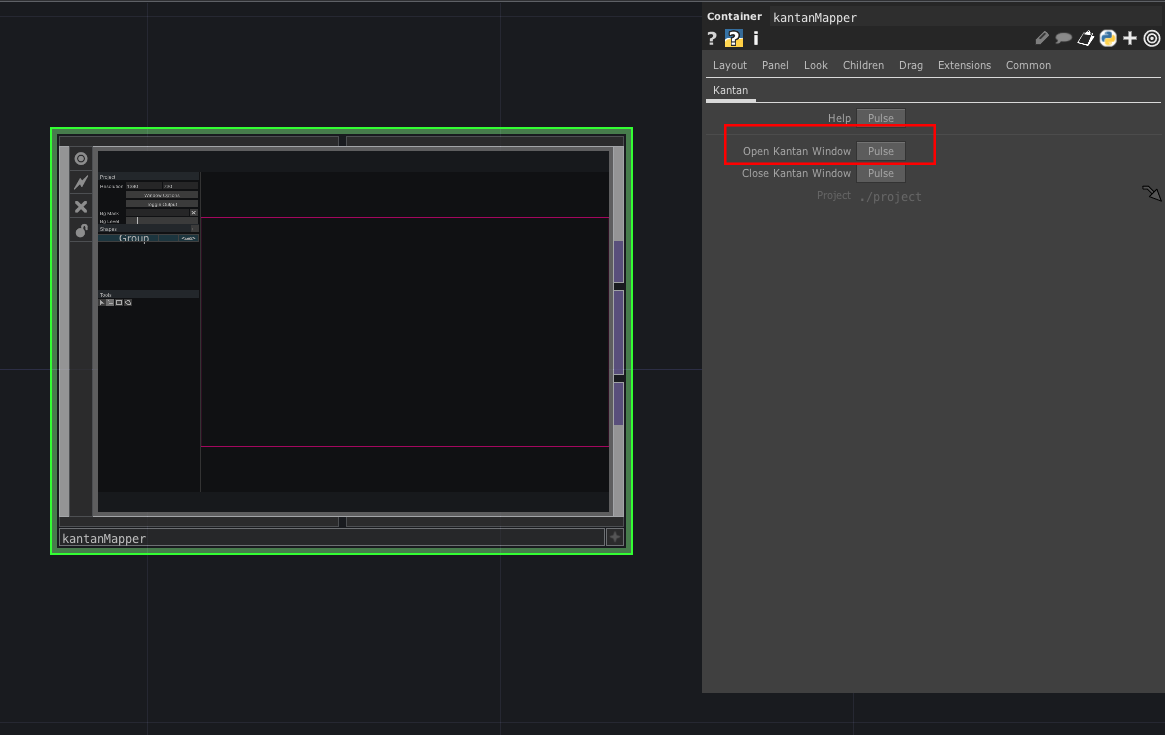
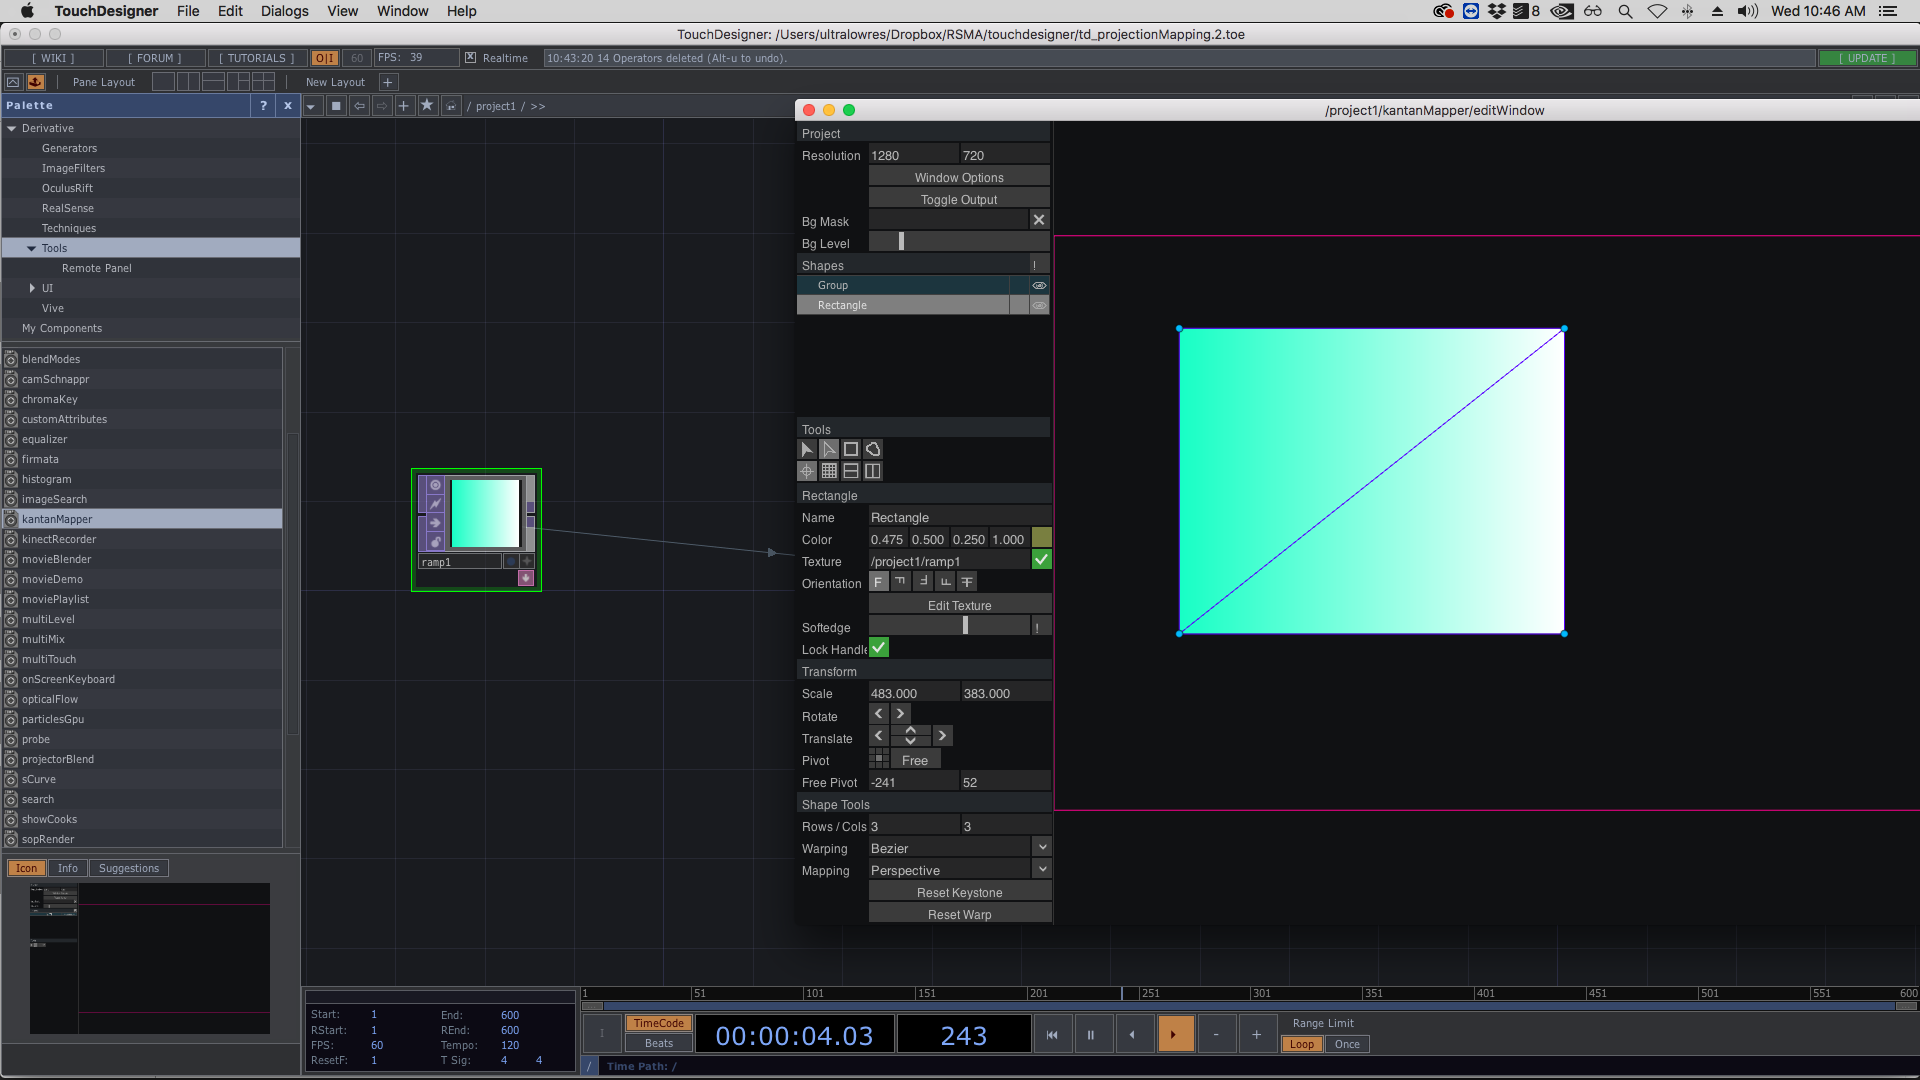
Select the kantanMapper COMP. In the parameters, click the “Open Kantan Window”. This will open up the Kantan Mapper interface. All of your warping, masking and translating will happen in this window.
![]()
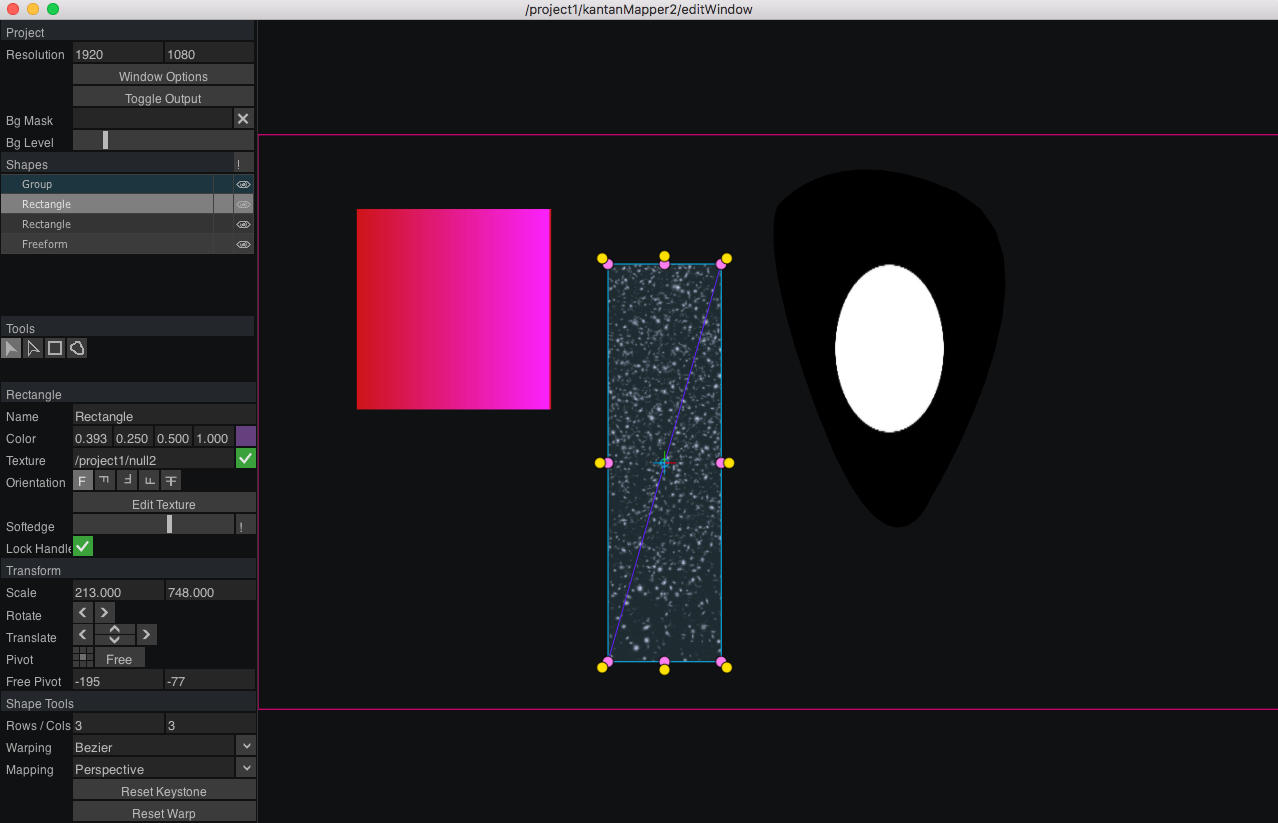
Inside the Kantan window, create a new projection “surface” by selecting either a rectangle or freeform object. Let’s start by clicking the rectangle icon.

A new rectangle shape should show up on the screen. You can select the “empty arrow” tool and move the corner pins around to create a warped surface. You can see there is a line in the lefthand panel that says “texture”. We can populate this surface with a texture from our network by simply dragging the texture we want to use onto this section. To make the texture visible, click the “X” box next to the texture name.
Select the “edit texture” option in the left hand panel to open up a new window.
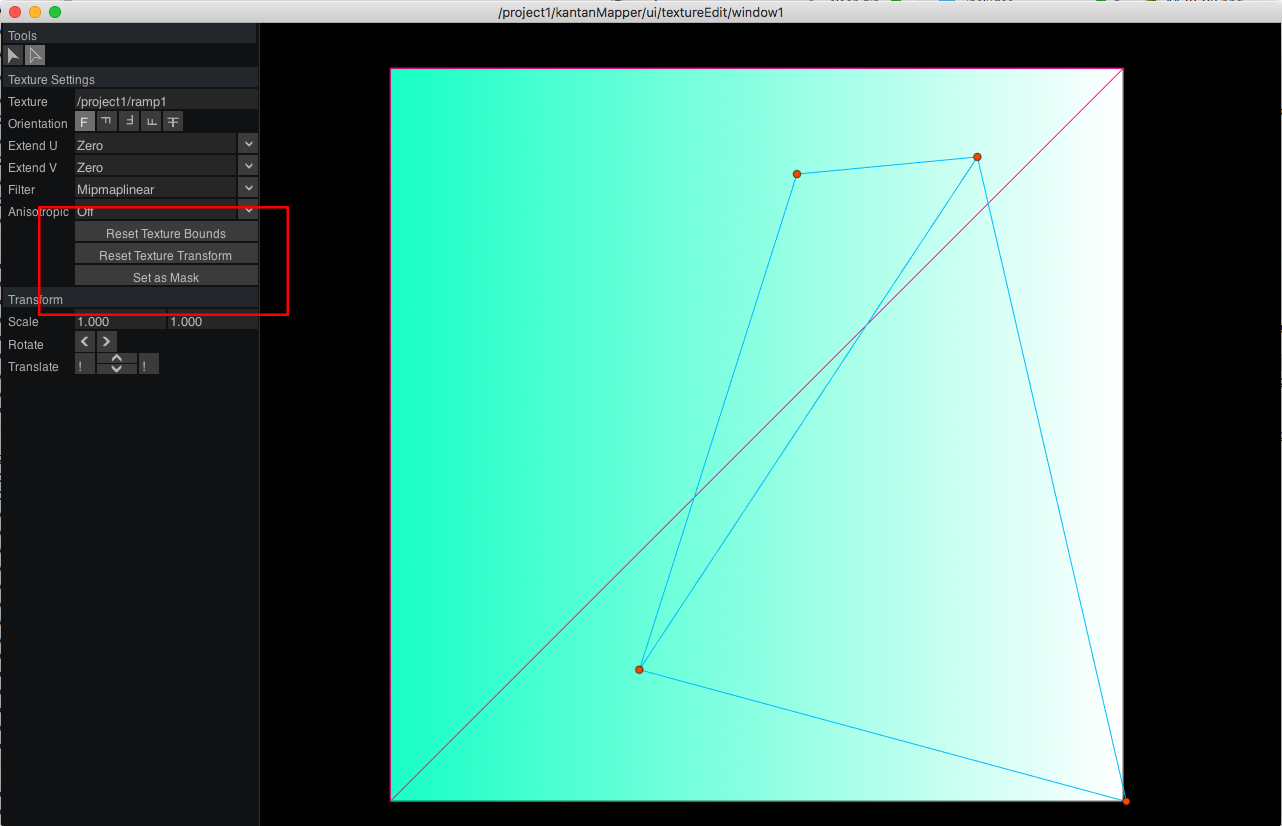
Here, you can select your region of interest. Any content within the selected region will be crammed into your surface, so be wary of unwanted warping. If you want the exact shape of the surface to act as a mask on your content, select the “set as mask” option.
You can create new surfaces by clicking on the rectangle or freeform icons. In freeform mode, you can essentially draw around the physical object you want to map to. Along with drawing inside the kantanWindow, you can also move your mouse over to the actual projector and draw directly through the projector display, on the actual physical object. You can always go back and select a surface to modify its corner or bezier pins.
At this point, you are ready to go. If you use null TOPs as your input textures, you can essentially change whatever content you want and your mappings should stay the same.